Conduit Bending Calculator
Enter the offset height, saddle or stub-up and get the marks to measure and bend.
Free · runs in your browser · nothing is uploaded
Recent
Your last 10 settings, saved only in this browser. Nothing is uploaded.
How to use the Conduit Bending Calculator
- Choose the type under “Bend”: “Offset (two bends)”, “3-point saddle”, “4-point saddle”, “90° stub-up” or “Back-to-back 90°”.
- For an offset or saddle, type the “Offset or obstruction height” and pick its unit. Then set “Bend angle”, or “Centre bend” for a 3-point saddle.
- For an offset, set “You measured” to “From the conduit end to the first bend” or “From the conduit end to the obstruction”, then type the “Distance”. For saddles, the distance runs to the centre (3-point) or the start (4-point) of the obstruction.
- For a 4-point saddle, also enter the “Obstruction width”.
- For a stub-up or back-to-back, type the “Stub height (end to the back of the bend)”, choose the “Conduit” and “Trade size”, and leave “Take-up” on “Hand-bender table” or pick “Enter my bender’s take-up”. Back-to-back also needs the “Back-to-back length (outside to outside)”.
- Under “More options”, “Constants” switches offsets and saddles between “Bender chart (rounded)” and “Exact trigonometry”.
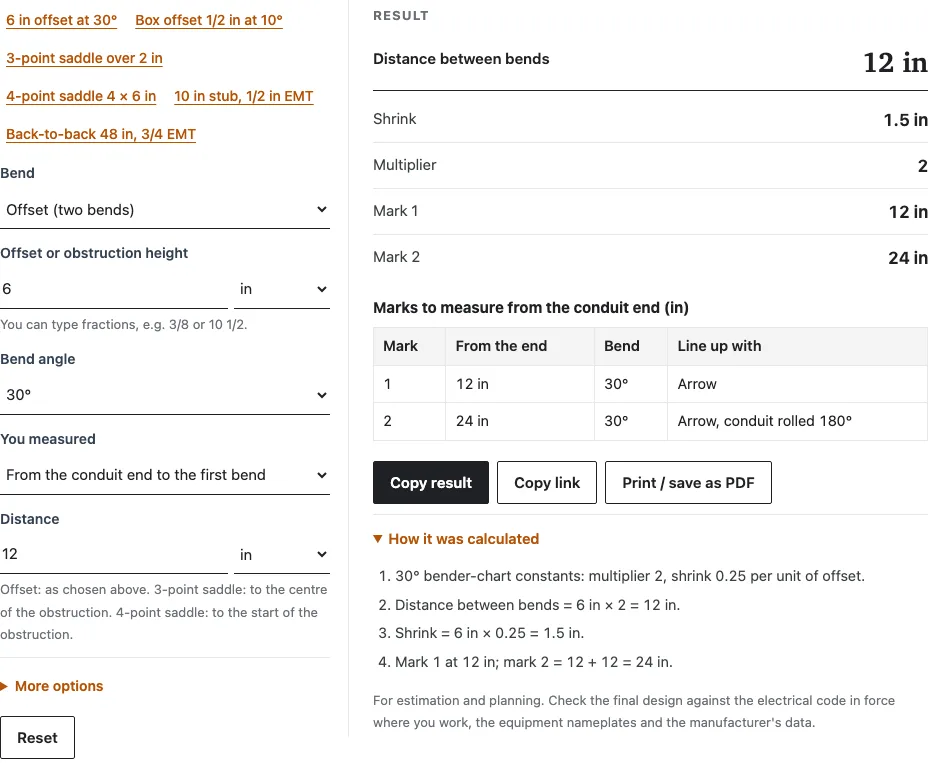
- Read the marks table: each row gives the distance from the end, the bend angle and the symbol to line up with.
The example buttons above the form, such as “Box offset 1/2 in at 10°”, load a full setup. “Copy result”, “Copy link” (a link that reopens the same inputs) and “Print / save as PDF” keep the marks; “Reset” restores the defaults.
How to calculate a conduit bend?
For an offset, multiply the offset height by the multiplier for the bend angle to get the distance between the two bends, and by the shrink factor to get how much shorter the run becomes. The multiplier is 1 ÷ sin of the angle (2 at 30°), and exact shrink per inch is tan of half the angle.
A 6 in offset gives these figures, rounded chart constants first and exact trigonometry second:
| Angle | Between bends (chart) | Shrink (chart) | Between bends (exact) | Shrink (exact) |
|---|---|---|---|---|
| 10° | 36 in | 0.375 in | 34.553 in | 0.52493 in |
| 22.5° | 15.6 in | 1.125 in | 15.679 in | 1.1935 in |
| 30° | 12 in | 1.5 in | 12 in | 1.6077 in |
| 45° | 8.4 in | 2.25 in | 8.4853 in | 2.4853 in |
| 60° | 7.2 in | 3 in | 6.9282 in | 3.4641 in |
Measured to the first bend at 12 in, the 30° offset puts mark 1 at 12 in and mark 2 at 24 in, with the conduit rolled 180° for the second bend. Measured to an obstruction 20 in away, a 6 in offset at 45° puts mark 2 at 20 + 2.25 = 22.25 in and mark 1 at 13.85 in.
How do I bend a 3-point saddle?
A 3-point saddle has a centre bend of 45° and two outer bends of 22.5° (or 60° with 30° outer bends). Mark the centre at the distance to the obstruction’s centre plus the shrink, then place the outer marks the same distance either side. Bend the centre first, then both outer bends in the same plane.
For a 2 in obstruction whose centre is 20 in from the end, with a 45° centre bend:
- Chart constants: 2.5 from the centre and 0.1875 in of shrink per inch of height.
- Centre mark = 20 + 2 × 0.1875 = 20.375 in, lined up with the centre-of-bend notch.
- Outer marks: 2 × 2.5 = 5 in each side, at 15.375 in and 25.375 in.
- The whole run shrinks by 0.75 in.
How do I calculate a 90-degree stub-up mark?
Subtract the bender’s take-up from the stub height you want, measured from the conduit end to the back of the bend. Put the mark at that distance and line it up with the arrow, hook toward the free end. A 10 in stub in 1/2 in EMT, with a 5 in take-up, is marked at 5 in.
The hand-bender take-up values the tool uses (from the Klein Tools guide) are:
| Conduit | 1/2 in | 3/4 in | 1 in | 1-1/4 in |
|---|---|---|---|---|
| EMT | 5 in | 6 in | 8 in | 11 in |
| Rigid / IMC | 6 in | 8 in | 11 in | not listed |
The marking on your own bender head governs, which is why the tool lets you enter its take-up.
Worked examples
| Input | Result |
|---|---|
| 6 in offset at 30° | 12 in between bends, shrink 1.5 in |
| 6 in offset at 45° | 8.4 in (≈ 8 3/8 in) between bends, shrink 2.25 in |
| 2 in obstruction, 45° centre, centre 20 in from the end | marks at 15.375 in, 20.375 in, 25.375 in |
| 4 in high × 6 in wide obstruction at 30° | marks at 17 in, 25 in, 31 in, 39 in |
| 12 in stub-up, 3/4 in EMT | mark at 6 in |
Calculated by the tool above; open it with the same values to see each step.
Questions, briefly answered
What is shrink and why does it matter?
Bending an offset or saddle sends part of the conduit along a diagonal, so the straight run ends up shorter than the conduit you marked; that difference is shrink. Add it to a measurement taken to an obstruction, or the offset will finish short of where you need it.
Are conduit shrink values exact?
The chart values are rounded. A 6 in offset at 30° shrinks 1.5 in with the chart constant and 1.6077 in with exact trigonometry; at 10° the chart’s 1/16 in per inch compares with about 0.087 in.
What is the multiplier for a 30-degree offset?
The multiplier at 30° is 2, so the distance between bends is twice the offset height. A 6 in offset puts the bends 12 in apart.
How does the back-to-back 90 mode work?
Mark the first 90° as a stub-up. From the back of that bend, measure the back-to-back length and line the second mark up with the star symbol. If the bender does not fit that way, the tool also gives the length minus take-up, used with the arrow and the hook facing the first bend.
How many inches do you deduct for a 90 degree bend?
With a standard hand bender, the deduct is 5 in for 1/2 in EMT, 6 in for 3/4 in EMT, 8 in for 1 in EMT and 11 in for 1-1/4 in EMT. Rigid and IMC need more for the same trade size.
How many bends can a conduit run have?
For EMT, the total of all bends between pull points may not exceed 360° (NEC 358.26). The tool warns about this when you choose 60° bends, which make pulling wire harder.
Related tools
- Conduit Bending Chart: print multipliers and shrink for a whole range of offsets.
- Conduit Fill Calculator: choose the trade size before you bend it.
- Junction Box Size Calculator: size the pull box where the run ends.
- Box Fill Calculator: check the box your offset leads into.
- Voltage Drop Calculator: check a long run once its length is known.
- Wire Size Calculator: size the conductors that go into the conduit.
- Conduit, Box and Load Calculators: see every raceway and box tool on the site.